�m���ɡnWindows Resource Threshold �m���ɡnWindows Resource Threshold |       |
Windows�b�w�ˤαҥ�SNMP���AResource Graphs�w�i����Memory/Disk�ƾڡAø�s�y�q�ϡC
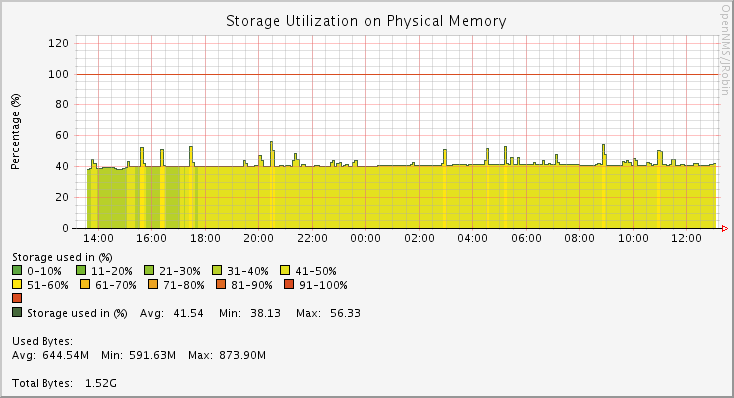
Memory
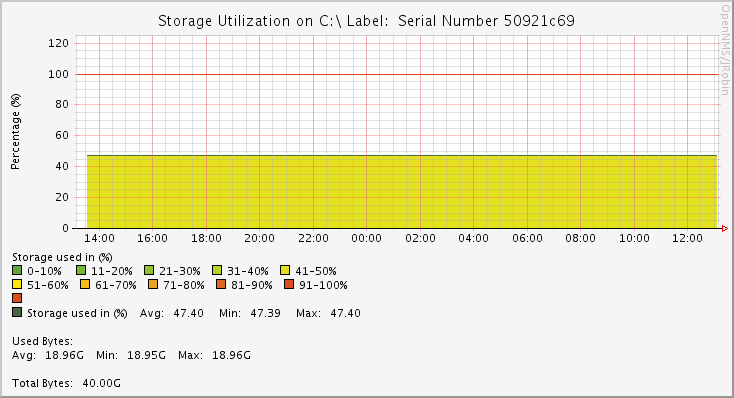
Disk
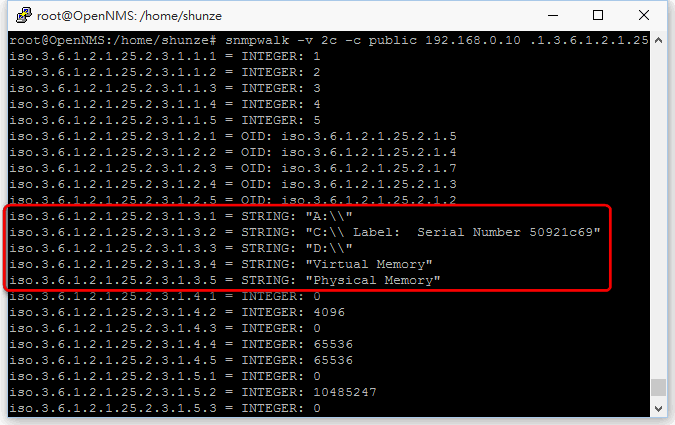
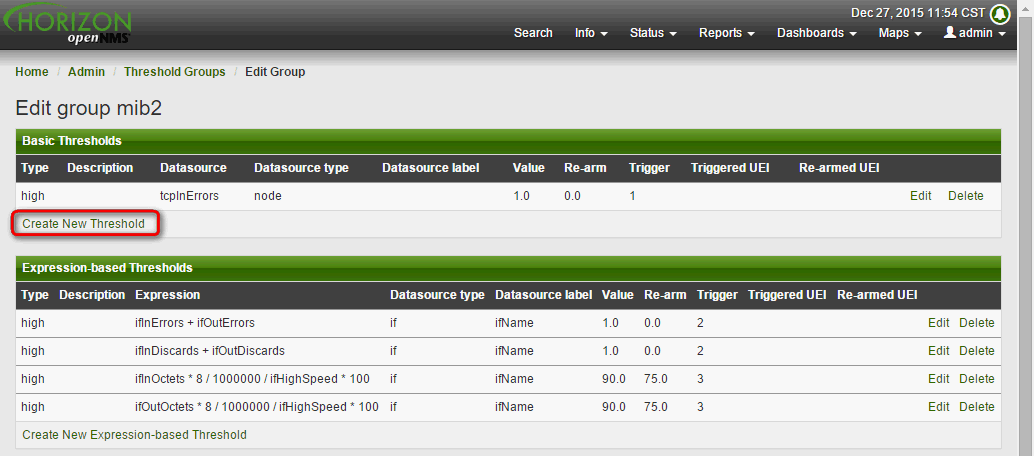
�Ө�ѷӪ��]�w�h�w�q�bmib2.xml���A���|�p�U�C
/usr/share/opennms/etc/datacollection/mib2.xml
##### Diks & Memory ���O�P�@�� #####
<group name="mib2-host-resources-storage" ifType="all">
<mibObj oid=".1.3.6.1.2.1.25.2.3.1.2" instance="hrStorageIndex" alias="hrStorageType" type="string" />
<mibObj oid=".1.3.6.1.2.1.25.2.3.1.3" instance="hrStorageIndex" alias="hrStorageDescr" type="string" />
<mibObj oid=".1.3.6.1.2.1.25.2.3.1.4" instance="hrStorageIndex" alias="hrStorageAllocUnits" type="gauge" />
<mibObj oid=".1.3.6.1.2.1.25.2.3.1.5" instance="hrStorageIndex" alias="hrStorageSize" type="gauge" />
<mibObj oid=".1.3.6.1.2.1.25.2.3.1.6" instance="hrStorageIndex" alias="hrStorageUsed" type="gauge" />
</group>
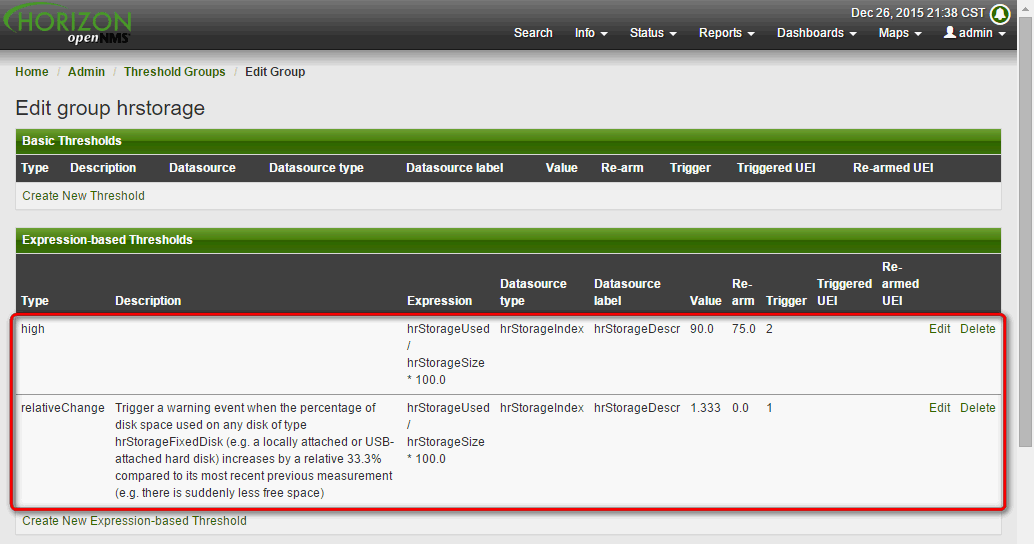
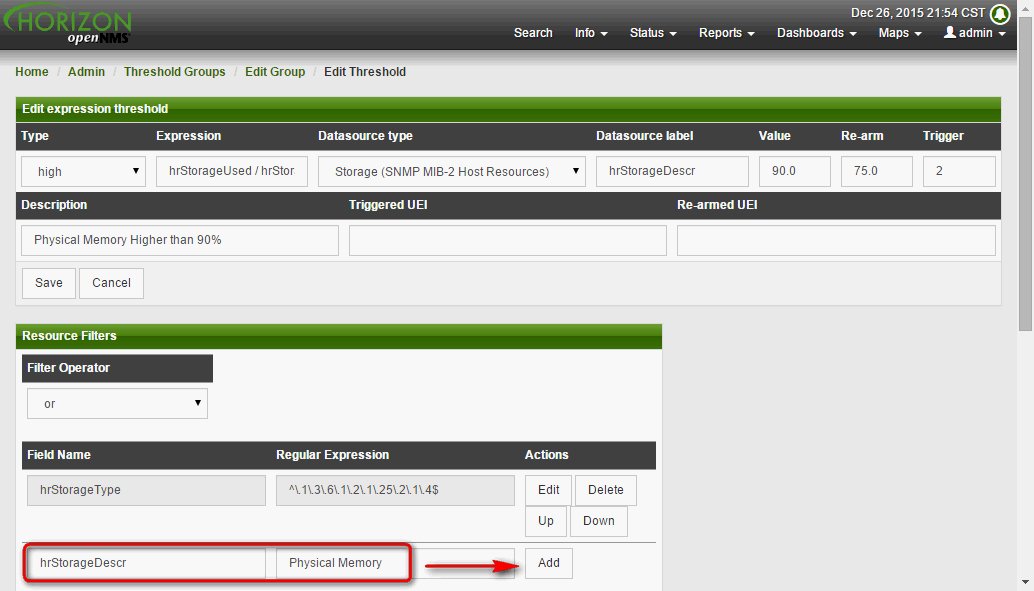
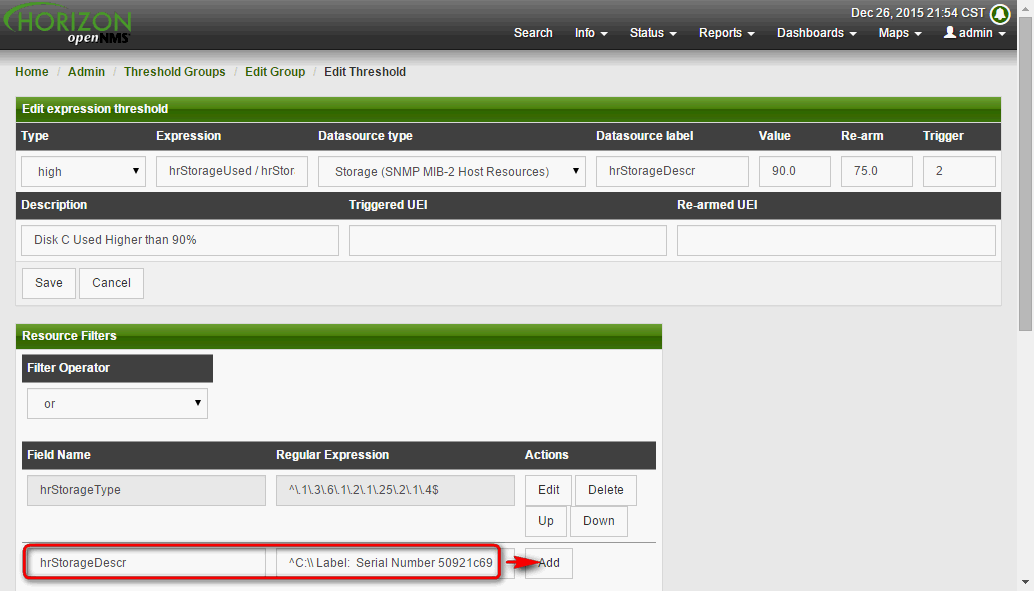
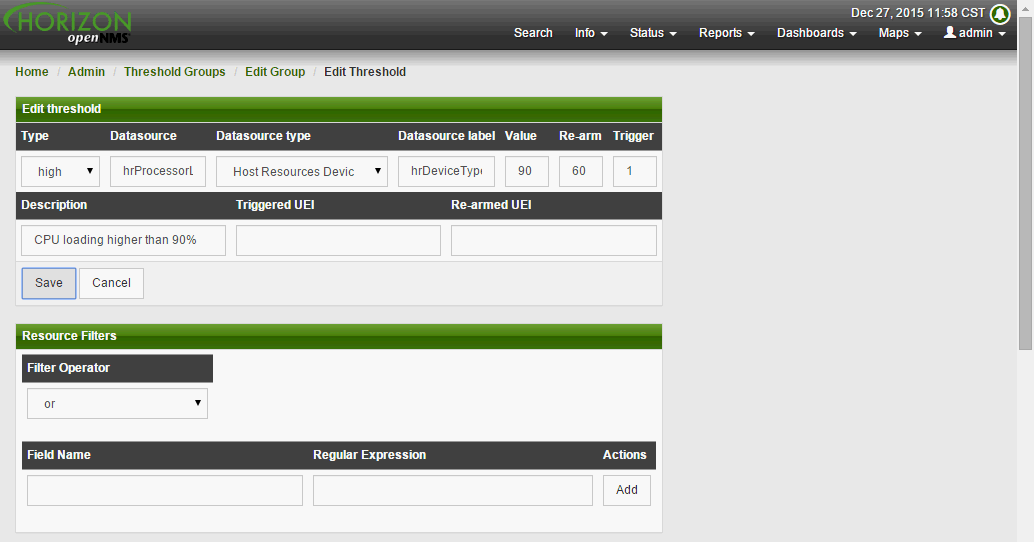
���F�o��oid�w�q�A�S��H�o�Ǽƾ�ø�s�y�q�ϡA
�ڭ̷��M�]�i�H�ϥγo�Ǽƾڨӳ]�w����threshold���iĵ����C
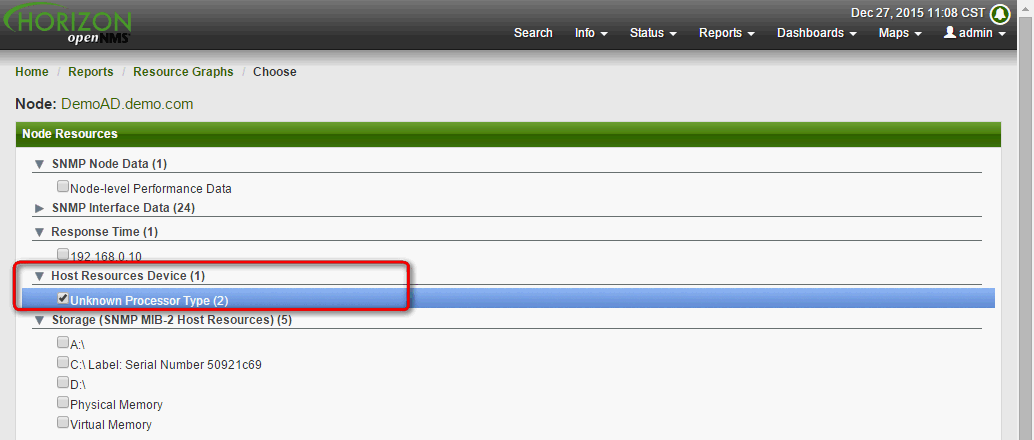
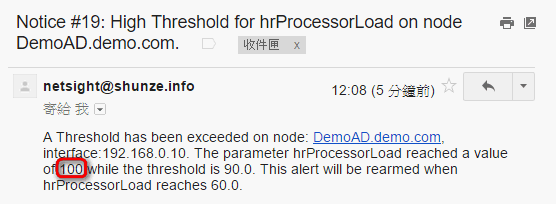
�H�W���FCPU�������ݭn�ۦ�W�[�~�A
Windows��Memory�PDisk��threshold�]�w�A�ڭ̳��i�H���t�ιw�]��threshold�Ӱ��˥��M�Ωέק�A
�]�p�P�W�@�g Linux Resource Threshold �һ��A�ڭ̥i�H�̻ݨD�ӫإߦۤv��threshold�A
�]�i�H�̦U�D�����ʽ褣�P�A�z�LIP�Ӷi��������L�o�C
�o�����аѦ� Linux Resource Threshold�A���g�N���A�����حz��
Windows��threshold�]�w�즹�i�@�q����
�ѦҸ��
���ê��Dzߵ��O��

♥���l�ѱC������A�Цh���ӡ�
If you don't like something, change it.
If you can't change it, change your attitude.
Don't complain!
|


 2015-12-26, 22:47